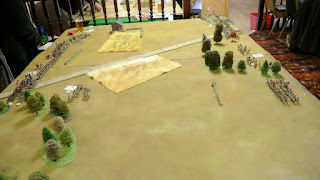
Saturday 22 June 2013

The Fatigue Rule

The Black Powder (BP) Rules are obviously written by and for war-games who have the luxury of an seemingly endless table top. Sigh! I guess it‘s a war gamers dream, but the common club reality is 6x4 or 8x6 if your are generous. The movement rules in BP do not reflect this and you can end at the opposite table at the end of turn one. Also your unfittest Infantry regiment is able to out run your Cavalry in some situations by the double. Mooh!

You can change this by fiddling about with the distances, but you end up with too much calculations going on in your head or the need to redesign the short references sheet.

So I came up with the Fatigue rule.

The distances simply stay the same. The first movement is done with 100%. The possible second is done with 50% and the third is done with 25% of the initial movement of the unit (all rounded up to the nearest higher inch). This reflects the wear out of troops pushed to the limits and at the same time you have still the possibility for an glorious run to the enemy. All units are treated the same. Artillery and commanders as well as the rest.

So for example in BP the Infantry can run maximum 21 inches, which is a lot nearer to the Cavalry, at 18, than before with 36! Also the decreasing distances available make it worthwhile to think about which one to use for reforming or changing the formation or when to cross an obstacle.

Voilá enjoy!


The French are coming!

The Rebels have been chased by the elite brigades of Lord Taylor for weeks. The news reached him that the French were on their way to join up with them. He had to attack now! Even with his dragoons out and about screening and foraging. He ‘found‘ some marching orders of the French which revealed most of their positioning. Not all the forces were united yet. Now was the chance!

Once again we played with ‘Eve of Battle' an Black Powder AWI game. But this time I played the Redcoats and Paul the Rebels.

I had a nicely tight infantry army packed with elite troops and two cannon units.
Once again I had the luck to draw ‘lost depeches‘ and delay one enemy unit and the enemy out on the open field. I had to start the battle, as a card forced me to do so.

Paul had some upgrades, two gun units and elite cavalry(!) and two extra french infantry, 25% wood cover on the filed and a swamp (impassable)...

As we started the table looked similar to the ‘Barrels Bush‘ scenario form last time. Paul had luck and had the 25% of woods on his side of the table. I was able to redeploy with all of my troops and shifted the weigh of my attack on Paul‘s right flank where his cavalry was isolated. After some failed orders I reached the peak of the woods and entered with my Light Infantry which was upgraded as an Elite unit, geared to finish off the Indians and the Militia. It all looked promising.

Paul did tried to redeploy and to soften up my centre, but it wasn‘t until later in the game. He attacked my Grenadiers with his Elite Light Dragoons, but to no avail, they didn‘t crack and his Cavalry had to retreat to lick their wounds.

My plan was to separate his line and cutting his army apart in the woods, Elite LI against Indians and Militia, so that the forrest would work against him, but my advance was too slow.

The Battle will start now for real. We had some skirmish and some failed tactics on the right and the centre, but its now too late for that ...

After the 5th turn we stopped the game and will continue next week.


The American line
The British Centre
The Woods in the centre as a tactical objective

The British advance ...

... and finally reach their target.

The British are in the woods!

The battle begins ...


Eve of Battle

Umpire? Umpire? An extra who carries the figures, makes sure the whole is nicely balanced (or unbalanced) and is here to interpret rules disputes ... naaah!
It‘s time to make war games table top battles sexy again!

I often wondered why on earth replaying the same historic battle over and over again? Wouldn‘t that be a bore? But we shun fantasy battles, of course, rally to the history books, I can hear them say. But the indisputable truth of the fantasy games is that you can make your own scenarios. And there is the trick, often the battle is half fought just by deployment. If you want to ‘slip‘ into the boots of the generals of former times, what‘s missing is the pondering over battle maps, waiting for  aide-de-camps to come in with bad or good news like, ‘Sir, Monsieur Blücher sends message, he won‘t make it today!

The pre-battle is important too. Of course we don‘t want to make ardous administration to a hobby past time. How many troops are you able to concentrate at the right spot at the right time? Are all the scouts out? What about ammunition, morale, health and other condition the troops could be in? What about the weather? Or battlefield itself? Did you managed to press those bloody rebels into the open to finally crush them or have they lured you again deep into the woods, were your redcoats are fine shooting targets?

So I developed a card game, 10-45-minutes to play, to compress these features into a competitive game for the better (or not) Battle conditions: Eve Of Battle. The design is underway ...


Friday 7 June 2013

Continuing Blunders at Hot Barrel‘s Bush

'His aide de camp must be writing in greek, Lord Paul fumed, so many misunderstandings in one battle... or worse he was a Rebel spy!!!  His only chance would be an all out attack, while his battered troops had left some sort of stamina in them. He ordered the signals: and the Grenadiers went forward, the 64th, the Hessians and the Light Infantry... the LI moved in the opposite direction? He came immediately to the conclusion he would have this Aide shot,no, he would do it himself, once the the rider came back... or no, he pulled the reigns of his horse and galloped in the direction of where rider had vanished, blade drawn.'

We continued the battle from last week (BlackPowder), and after some logistical quarrels were able to reconstruct the positions exactly.

It was the British first turn and their centre was still in a somewhat unformed state, their troops, just with fading spirits, getting mauled by the American as the day grew longer.

Pauls only chance was an all out attack and he did. The American cavalry got defeated and nearly went off the table. The French kept firing for their lives, as the British grenadiers went close in and wiped them away. What started so well in the beginning went sour at the end of the turn. Another British line was repelled and – guess what, the British LI, Paul‘s last hope to unlock the American ‘wooden fortress‘ at Barrels Bush failed in another disastrous blunder – a double retreat. The tide has turned.

As most of the American kept their line and shot and decimated, what was left from the Redcoat attack; the Indians shot at the Royal Artillery while the Rangers went out of the woods to finish them off. The Hessians retreated and the rest of the British Army was in the centre field in no state to relaunch the attack. Nearly half of the British were destroyed and out of humanitarian reasons (the generals were thirsty) we called the battle off – the Americans clearly won the day.

The second British Attack on Barrels Bush ends with a blunder

British all out attack

While the British center tries to reform

The heavily mauled Grenadiers avoid the American Artillery

The fight at the American barricade

After the last British attack had failed

The American shoot back

The American Artillery aiming for the Hessian

After the end of the day, the tory farmer wasn‘t the only one with the ‘Lampe an'...


Sunday 2 June 2013

Big Blunder at Hot Barrel's Bush

(Black Powder with scenario pre-determinator)

‘Brigadier General Lord Paul Engage was rightly perplexed, when he was observing with the aid of his monocular the deployment of the main Rebel force of General Michael Laundrington appearing now on the opposite flank of the small forest. He had chased the Rebels for long weeks through this swampland and was seemingly successful to lure them out of their favorable habitat. A Sergeant from the scouting LI Brigade had found out earlier about a tory farm near the road, where they fortified their position to set a trap. The Rebel‘s advance would be on the road between the farm and the small forest called ‘Barrel‘s Bush'. This would be where the Grenadiers, the artillery and even some battle hardened Light Dragoons would give the rebels a sharp surprise they won‘t ever forget…

As one of the Light Dragoons Officers was approaching Lord Paul with a blood-stained, but empty depeche bag of one of his aides-de-camp, he knew that something that should‘t have happened, did…‘

Paul was playing the British forces, three Brigades, with two pieces of Artillery and even a small unit of Light Dragoons, while I was trying to led the American forces, consisting of similar forces but of lower quality, out of the danger or even victory.

We had set up the battle with the help of my card game pre-determinator, I will now humbly baptize, ‘Eve of Battle‘. Paul had the upper hand, as he managed to secure a mostly woodland free area (woodland 25%), no good ground for the Americans to start with. He had drawn a farm building (good defensive position) plus additional barricades, and were able to upgrade his Chief in Command, 'buy' another gun, upgrade his cavalry to elite status and draw in two extra Hessian units. Splendid.

I had upgraded two of my commanders, bought another gun, had also my cavalry upgraded, but was just able to drew in only one additional unit of our beloved French allies.

Event wise, both sides had extra 'barricades', Paul had the 'scouts' and a 'surprise attack', while I had a 'delayed enemy', which can delay one enemy unit of my choice and 'lost depeche' which gives the right to re-deploy after all enemy deployment, even after his 'surprise attack‘. So Paul needed to leave his strong positions to get to the fight, while I was risking being fought to near the table end. I also had the ‘speech', which raised the moral of my troops, but the effect worn of before even just one break test was needed.

Given the fact that the simple line unit of each british brigade was equal to an elite unit of the American (which of only one existed due to upgrading), I was in trouble.

On the first turn, Paul ordered to advance on mostly all of his line, while I secured my positions. Next the British advanced again while my CinC blundered and plunged my right flank into utter chaos. On the following turn, the British general also blundered and threw his advance into chaos - a very bad position to be in front of two American cannon units. In return kept all under control again and shot with all that could carry a gun or hold a barrel - the superior British forces got nicely soften up.

Meanwhile the American tried to rally their weak right flank on the road and get them to fall back through the small woods towards the center. An action which failed and continued to do so for the rest of the battle.

And again next turn Paul rolled for a blunder and his Elite Dragoons foolishly attacked my line behind the barricades frontally. They had to retreat with an awful lot of bloodied noses, while the Americans kept firing with all barrels.

Then a British line attacked the American positions in the little wood on the centre of the field, which was now my Woodland fortress filled with (Stockbridge) Indians and Rangers. He mauled them with a barricade of artillery first fire and gun shots but just managed to fell trees... next the Indians (and Rangers) shot back and managed to kill one British Battalion (huzzah!), which left a gap in his lines…

After another British blunder, which brought chaos in their advance, I shot and attacked his battered flank with my fresh Dragoons, but sadly the line held.

The British advance dragged on and the center was badly mauled and heavily disorganized, on both sides in total we counted no less than FIVE blunders in this game, hence the name of the battle, even with all the upgrading of the commanders, one would think the command phase was a safe bet.

We still decided to continue (maybe next week or a week thereafter), the British position was in a bad state, but on the other hand due to my decision to defend and not attack the British on their fortified farm, the Americans are dangerously near to the table edge and one unit is already off the table…
(to be continued)


Initial Deployment

Abandoned farm except LI and refreshments

Deployment after the depeches were found

The American line

The British centre

The British advance

The British joined by the Hessians

The British mauled centre

The British attack on Hot Barrel‘s Bush...

...and the resolve
The fateful Dragoon attack on American barricades...